
Auto Retopology Comes to Maya
So you’ve made that intricate jet engine from many different pieces and now have to combine a few of the pieces together neatly? Enter retopologizing!
The only issue - up until recently to retopologize you’ve really only had a few imperfect options:
- Slowly using the Quad Draw to draw a new mesh over your model
- Painstakingly boolean-ing together your pieces and doing a lot of cleanup afterwards
- Exporting to another software to use their tools
- Or some combination of the above
The good news?
The good news is it appears Autodesk is now implementing an automatic retopology tool-kit very soon. How do we know? Well the tools already exist inside Maya - no plugins required!
Better yet - they’re really as easy as two clicks to use.
So until Maya fully implements this toolkit into the UI, I've put together a simple guide on using these versatile tools.
Get started below!
Update to this Article
- Update! These tools have no been properly implemented into Maya 2020 and can be found on the Modeling Shelf and Menu!

Video Tutorial
Written Tutorial
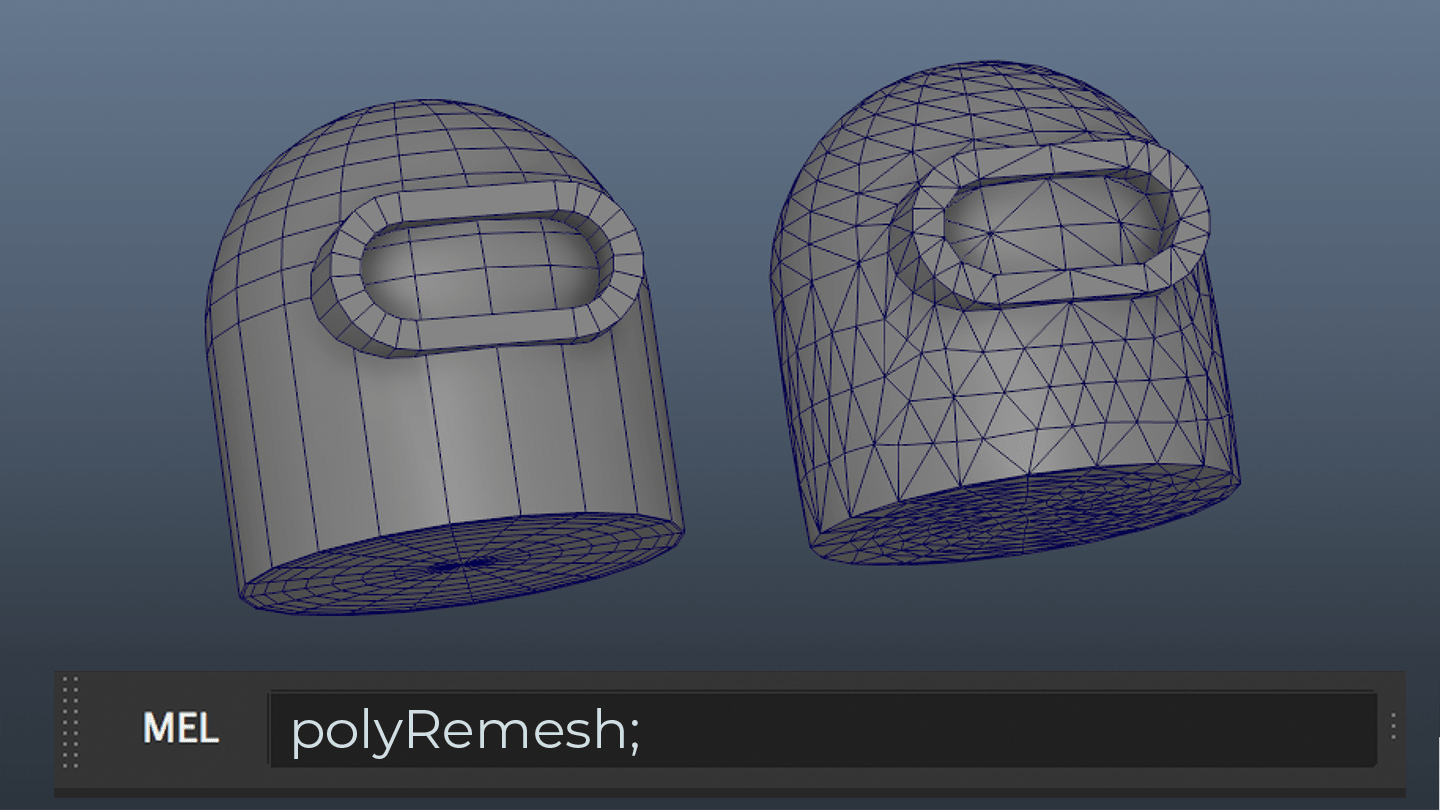
1) Select your model, and in the command line type ‘polyRemesh’.
This will perform an operation similar to the ‘add divisions’ tool - subdividing your model -but in this case using triangulation to get a more accurate representation of your model.
(Make sure your history has been deleted, and keep a backup of your original model).

2) Play with the settings of the polyRemesh to increase or decrease the subdivisions if it hasn’t accurately captured your geometry.
This can be tricky to find a nice balance but is definitely worth it to help make your geometry a consistent level of detail.
3) Once its remeshed, select your model again, and again in the command line type ‘polyRetopo’.
Play with its settings to tweak the output model as needed. Again this can be tricky


4) Play with the settings of the polyRetopo
For this you'll only really need to change the Target Face Count. If you've done everything else right, this should be all you'll need.
Tips and Troubleshooting

The polyRemesh and polyRetopo nodes both respect hard edges (but not Edge Creasing) so ensure that your model had the right soft/hard edges before using them.
Additionally by putting in some temporary hard edges you can force the Retopo to keep that line intact.

Keep in mind that you don't need to use polyRemesh to retopologize (polyRemesh and polyRetopo are completely seperate node operations). polyRetopo will work with any mesh.
But you will get better results if you do use it as it will provide better uniformity to the models resolution/detail
So that's it - two simple nodes and a bit of playing with the settings.
Until Maya fully integrates these functions you can use this simple process to bind together and retopologize your models!
Enjoy!


